Showing posts with label Spiderman. Show all posts

Saturday, April 30, 2011

Tempest Freerunning Academy

If you spend half as much time daydreaming as I do, then without a doubt at some point the thought, "What if Spiderman were real?" has crossed your mind. Imagine being able to climb buildings and jump from streetlight to streetlight without utility belts or grappling hooks. To be able to sail through the air and land on your feet like a cat, ready to spring into your next move...

Well, through the science of human persistence, and the art of extreme sport, there is such a way to do all of those super human things! It's called Parkour, a mix of martial arts and gymnastics, designed to allow a person to move fluidly through rural structures. Defined as the art of "finding your own way", a freerunner can get from one point to another without ever stopping, no matter what obstacles are in the way.

The concept of being able to run and duck and leap over anything instantly makes me think of Mario. If only there was a real place that a plumber could practice his moves to improve his chances at rescuing the princess...

And, of course, there is! Check out this video to see some amazing moves. Even better, sign up for classes at the Tempest Freerunning Academy and learn how to be your own Peter Parker!


So why did I post this awesome video on my blog? Can I hurl my body off a suspended pipe and pull myself over a 15 foot wall? Not on my life! But I can paint 8-bit bricks like nobody's business! Many of Team Tempest are also stuntmen, and I've worked with them on various projects. They came up with the idea of painting their 7,000 square feet of freerunning course to look like different environments, so they called me in to do the job.


Photo 1: The "beginner's course" has a series of low level walls and hurdles, and its the first thing you see when entering the facility. The team wanted something that would really pop, and also appeal to the younger audience of future freerunners they are targeting to train. So they came up with the concept of painting it like Mario's world. We started with this image. A more fitting scheme if ever I saw one.


Photo 2: At the back of the gym, they wanted something urban and contrasty to the bright, cartoon like Super Mario course. One of their reference images was this building designed by David Bell. It is both clean and gritty at the same time. Greyscale and colorful combined. So we based the back tower on this.


Photo 3: The entire course was designed by famed X-gamer Nate Wessel. It was constructed out of solid woods, and I found it like this, raw white primer.


Photo 4: Being that each section WAS an obstacle course, there were no wide open walls. Every few feet, there was a step, a ramp, a tower, or a pit. Every wall had 4 surfaces, so there was a lot of painting to be done.
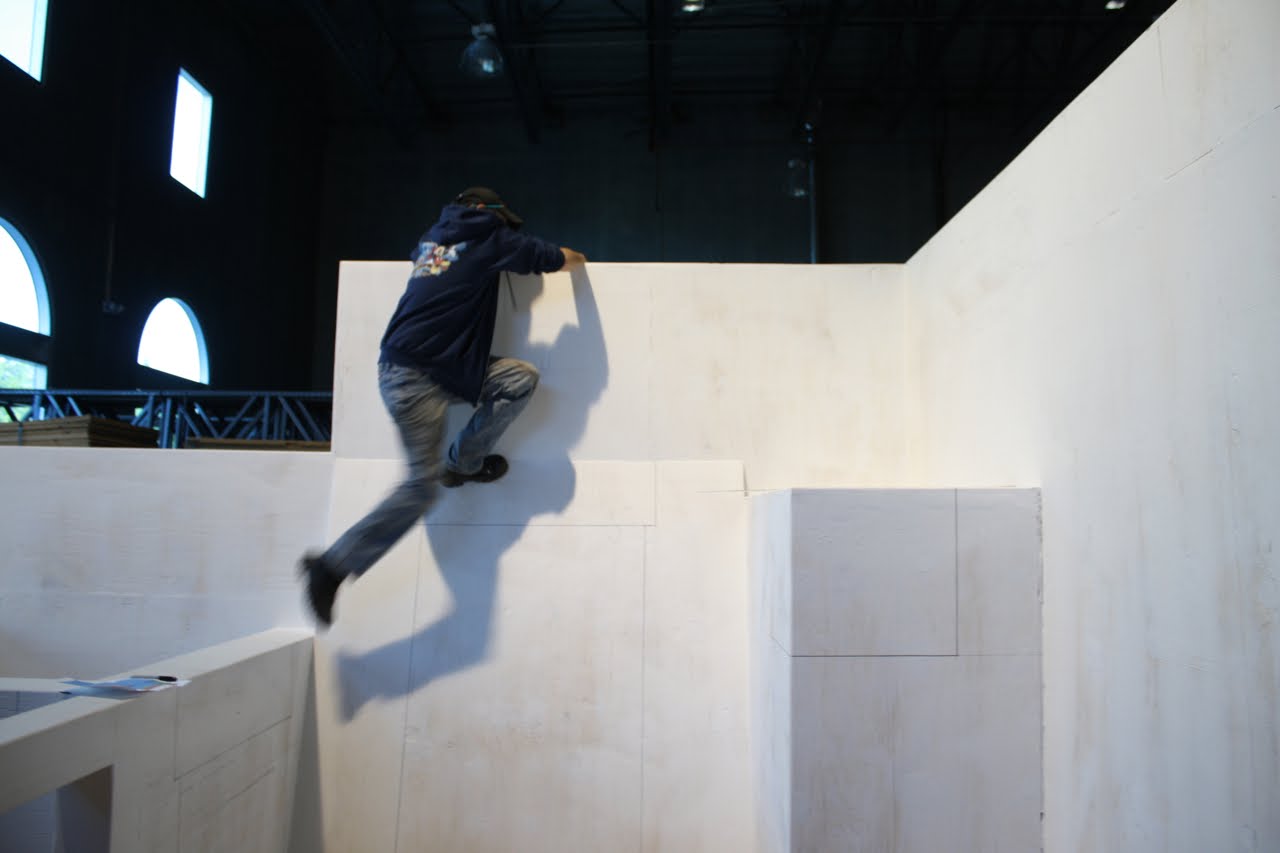

Photo 5: I had to attempt a little freerunning myself, as the small spaces, multiple tiers, and sloped walls made it hard to get stepladders or apple-boxes anywhere that they could be effective.


Photo 6: The first step was to mark off all of the basic color levels. The idea was that everything you could touch would be a solid object, so there was not going to be any sky painted, or murals of floating coins. I was basically laying out the entire course as ground, brick, pipe, and question mark boxes.

It was harder to do than I though, since all of the construction was done to purposely not have any two surfaces on the same plain. It made it very difficult to execute a clean 8-bit look, as all of those lines should stay level at exact increments. Even harder was reaching all the places those lines had to go!


Photo 7: The next step was to put all the base colors on. This actually took a few days in Mario land. I wanted the colors to be solid and even, so it took multiple coats. And since it was all dark colors, we had to be very careful not to overlap designated areas, or the next color applied would take even more coats.


Photo 8: I used high grade exterior deep base paint so the color would hold, and it would last against a thousand pairs of rubber soles clamoring over it. My original plan was to tape everything off, but it turns out that a key component to the construction was to use a rough surfaced wood to allow for more grip. Inevitably, paint would leak into the rough grain and I would end up with a messier line than I would free handing it, so I went with the latter.


Photo 9: The trick with painting a freerunning course is that these guys climb EVERYWHERE, so every surface will be seen. For us that meant climbing over and under every part of the gym to make sure the paint scheme followed through. Here, Red 5 bases out the tops of coin boxes.


Photo 10: I made a few foamcore templates to help speed up the line work after all the colors were based out. I did a light pencil tracing, then Marissa followed through with a ruler, triangle, and sharpie. She made sure everything was straight, and the final black sharpie line made painting all the black more "coloring book" for me.

I do a lot of painting, but rarely so much detail on a standing structure. I was amazed at how much time we spent either flat on the floor, or hanging way up high on this project!


Photo 11: And the painting of black lines commences! You can see from this photo how much they pull everything together, though.


Photo 12: There was just a lot of them...


Photo 13: I took this photo with my phone right before cleaning the brushes. It has no rhyme or reason for being in this blog, I just thought it was a cool photo from the project!


Photo 14: I added a few highlights to the pipes, and Mario land was finished. Team Tempest was excited to get it done. So much so, that as I was putting on the final touches, people were flying over my head, jumping from wall to wall!


Photo 15: Here's a bird's eye view of the first course at the Tempest Freerunning Academy.

Photo 16: So, then it was on to the back tower. This section, too, had multiple tiers, and a sheer drop that landed in a foam pit.


Photo 17: The first step here was also to mark off the color levels, but unlike Mario Land, the math didn't need to be so specific. I chose the layered heights at random, varying from thick to thin and back again.

Despite the fact that these walls also had rough wood, I was able to tape off the colored squares because the more organic nature of the final look allowed for some bleeding between colors. This made painting this section much faster!


Photo 18: After all the squares were painted in a random patchwork of gray scale, a thin black wash was painted over everything, then wiped down to tie it all together. The very top 6 inches were painted bright red, both to add color and to serve as a warning that that level of the gym was off limits!


Photo 19: The finished back course. This is the highest structure at the academy. It houses steep ramps and a vertical tunnel filled with wide spread hand grips.

So, I may never be able to do any of the amazing things that Spiderman can do, but hopefully my artistic contribution to the Tempest Freerunning Academy will inspire you to train with them and give the web-crawler a run for his money yourself!

Sunday, November 28, 2010

Legends in 3 Dimensions Part 2

I received an overwhelming amount of mail from people saying that they either already owned an L3D piece, or that they were now seeking one out on eBay after the last blog about my sculpture house. I often look myself to see what’s available, as the original Legends line-up has been out of stock for almost a decade, and I’m always curious as to what the demand might be for them. There are a few pieces that seem to always turn up, and then a few others that just never make themselves available. Hopefully you can find the one that interests you the most!

Photo 1: The most popular by far, and probably the sculpt that got the most attention from collectors and critics alike, was my rendition of the Green Goblin. I presented to Marvel the idea of doing a “Versus” line, pairings of heroes and villains, squaring off face to face, yet still capable of standing alone if the collector only favored one or the other.

The first in the series was Spiderman, to be followed by his nemesis, the Green Goblin. I was able to convince the creative execs at Marvel to let me do my own interpretation of their characters, and I picked my favorite traits from various incarnations to design these busts.

The web-shooter wrist mechanism as Spidey’s base is probably my favorite of all the L3D bases. I took the design right out of a John Romita comic, and it fit perfectly. Stan Lee told me this bust was his favorite sculpture of Spiderman, and it can often be seen in the background of his publicity photos.

Photo 2: Even though the Goblin is a mask, I wanted to portray my portrait as a living entity. And I wanted to give the static piece a sense of flying, as if he was standing on his glider in hot pursuit of the web slinger. With pointed ears and twirling hat, this ended up being one of the most challenging busts to manufacture. A lot of times, sculptures will be done as one whole unit, and artists will let the factories decide how to separate the components and engineer the final fit. But you can never guarantee the outcome, and the art usually gets altered. So I try to do all the engineering as I sculpt the piece, keeping all the parts separate, as they will ultimately be molded.

Photo 3: Things started getting really busy for me as L3D got more and more licenses. I was travelling back to China more often, all along still working on film and television projects. I found that I was able to get the most sculpting done on the plane during the 14-hour flight to HK! Of course, I can’t do that any more, now that I’m not even allowed to carry on nail clippers, never mind xacto knives and sculpting tools!

Photo 4: My Marvel busts became very popular, getting a lot of press and prominent store placement. The popped up everywhere, like this ad for Sassy’s Satellite, a kit and collectible company out of New York. I started to feel like the hatred for pre-painted statues was beginning to dissipate. Fans were embracing the option of having a “model kit” that they didn’t need to build themselves.

Photo 5: We leveraged all the press to convince other studios to let me create pre-painted versions of some of their older licenses, things I loved as a kid but couldn’t get product for anymore. Battlestar Galactica was at the top of that list.

I know it sounds weird now that BSG is a household topic again, but in the mid 90’s, it was a forgotten relic of the 70’s. Often considered the “poor man’s Star Wars”, the original Galactica suffered a barrage of bad merchandising mishaps, including a young boy choking to death on a Viper missile which led to mass recall, and the cancellation of the rocket firing Boba Fett!

I had to beg Universal to let me shake the Galactica from the mothballs, a process that took several months. At the same time, Rob Liefeld pitched a new comic series to them. We finally convinced them there was enough interest that they gave us the go-ahead. Of course, the first piece I did was the Battlestar herself. I wanted the final product to be amazing, so I brought in my friend Ron Mendell to help me. He’s the best model builder I know, and he added an amazing level of detail to the Galactica.

Photo 6: As with all the licenses I took on, I had a whole series planned. BSG was meant to be a 5-piece collection. This Cylon Base ship was the second installment, and unfortunately the last.

Photo 7: This Cylon fleet had me more scared than a lone colonial pilot. I didn’t think it would ever leave the factory. Not because of lack of fan interest, but quite the opposite. Liefeld’s comic flew off the selves, and my prototypes received all kinds of press. The studio started getting a lot of movement on Galactica, which had been an idle property for 15 years. They started reissuing old licenses, and a rush of toys and model kits hit the stores at the same time my high-end collectible ships did. My limited edition of 1,978 pieces crawled out of the warehouse at $149.00 each, not able to compete with the under $20 toy reissues, and I had to pull the plug. I thought I was saving the best for last, but I never got that far. So you’ll have to visit my workshop if you ever want to see the Viper, the Raider, or the Cylon Centurion bust up close!

Photo 8: A completely different experience was had with the L3D Terminator line. I had originally only intended to do the Endoskeleton, and possibly talk Arnold, er, the Governor, into a bust. But Universal was developing the T2-3D attraction at studio tour, and they took a liking to the idea of a high-end collectible line for the gift shop. So I expanded with a miniature Flying Hunter Killer diorama.

Photo 9: The Hunter Killer tank followed, complete with crushed skulls. I was surprised how dark I was allowed to make the pieces, considering they would be for sale at a theme park.

Photo 10: I worked on Terminator 2, but not in the model shop. So it was an awesome experience to go down to Digital Domain and study the screen used models. They where flawlessly executed, and I did my best to capture all of the detail in such a small scale.

Unlike the busts, starships and vehicles start out with foam and plastic rather than clay. The basic shape of the tank was carved in a high density urethane foam, coated in a thin layer of glazing putty, sanded smooth, then finished with etched in detai

Photo 11: The Endoskeleton was a hybrid between a sculpt and a model build. I did the basic skull in super sculpey, baked it, sanded it, and then added plastic and metal details for the mechanical elements.

The studio really wanted LEDs in the eyes, but I felt strongly against it, believing it transformed the piece from a statue to a toy. Ironically, they did use my sculpture to make a toy. And a bottle topper. And a glowy flashlight thing. I think there ended up being 7 varieties of my sculpture available at Universal Studios, but I was proud of the fact that, despite the cheaper toy versions, the original cold cast porcelain version continued to sell out.

Photo 12: I think I may have cried when I got the phone call saying Paramount had agreed to give L3D the Star Trek license. I had always been a fan, and even more so had a great appreciation for the groundwork Roddenberry had laid for both science fiction and merchandising. I had had the honor of working on Star Trek before, but to actually have the title in my own line was something I could have only dreamed about.

But where to start? The Star Trek universe is ever expanding, and there is so much history in the lore. The original series was the obvious choice, but the studio was vague about its tangled web of likeness rights and approval procedures. The Next Generation was a random launching point, but First Contact was in pre-production, and it seemed like there could be some Cinergy in the cross promotion.

Locutus of Borg was my first Star Trek bust, and probably my most memorable experience while doing L3D. Patrick Stewart agreed to model for me as I sculpted, and I was to work in his private trailer between shooting scenes for First Contact. I had it in my head that I would be meeting the stern, uniformed captain of the Enterprise, and when I said I was there to sculpt his portrait, he would say, “Make it so.”

Instead, I met the soft-spoken British actor, wearing a bathrobe, who offered me tea and introduced me to his cat, who enjoyed sleeping on my lap as I worked.

Photo 13: Locutus was also the first release where the edition numbers where engraved on the base. I sculpted the edition size into the mold, but the factory was having difficulty matching the style for each individual edition number. So they were shipped to LA, where I opened each one and hand numbered them myself. Because of the movie release, Paramount had requested a limited edition of 5,000! That’s a lot of numbers to Dremel in! I started getting sloppy around 600, so I apologize if you own a higher number. Luckily, we ironed out the problem at the factory for all future editions, and Locutus was the one and only time I had to do it myself. Well, one and only 5,000 times…