Showing posts with label Codex. Show all posts

Monday, March 1, 2010

How To Build Codex's Staff Pt.3

All good things must come to an end. It’s sad, but true. Luckily, we saved the best for last! Not only do I think that this is the funniest of the three “Making the Codex Staff” videos, but this final entry also brings us to announcing the details of how you can own the very prop you have seen being made!
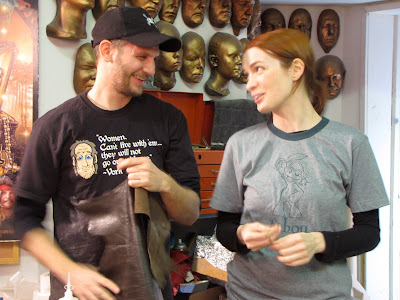
I think this video is particularly funny because Felicia and I had already done a full day of working at that bench, probably around 10 hours by the time this portion of the video started filming. We were both a little slap happy, and everything we did seemed funny to us at the time. Hopefully it seems funny to you now!

Despite all the laughing, we still managed to create an awesome version of the Codex Staff. It is exactly everything the original prop for the “Do You Want to Date My Avatar” video was, and, in my opinion, even better, because this one was hand crafted by Felicia Day herself! I can’t recall ever hearing about a collectible prop for a character in a show actually made by the creator and star of that show before. I can’t tell you how exciting it is to me that some lucky fan will actually own this! And it’s even better because all of the proceeds from the auction to win it will go to the Red Cross, a charity providing relief for the recent disasters in Haiti and Chile.


The staff is signed by both Felicia and myself, and is truly a one of a kind item. If you are a Guild fan, click on this link and bid for an amazing treasure and a great cause:


http://bit.ly/codex_auction

I will personally pack the staff and mail it to the winner to make sure it arrives intact. And feel free to ask me any questions you may have before you bid.

And for all of you who are making your own staff, here are the materials you will need for the final steps:

Gold spray paint

White acrylic paint

Tamiya Red clear acrylic

12”x12” leather

3/16” rough hemp twine

Cyanoacrylate glue and kicker

Spray 77 adhesive


Gather up all the parts you made last week, and grab these tools:

X-acto knife with #11 blades

12” ruler

Small paintbrushes

Once again, I want to thank my crew. You did an amazing job filming and prepping everything, and I look forward to working with you all on the next video blog. Brad did a particularly spectacular job this segment, especially in cutting in all the frames that show me at my geekiest!


This is so sad! I feel like I’m at an awards show with all these final thank yous! Luckily, I can promise more video blogs coming soon, with some very special guests. Of course, none can ever be as special as my first guest, Felicia Day! I hope she comes back for more. I had such a great time. I will, however, actively persuade her from using that table saw! (Cringe!!!)

And huge thanks to Fallbrooke for the use of their songs in all three videos. This video featured “The Best Thing”. You should definitely check out their whole album at fallbrooke.com

This segment also included another track from the LABOU soundtrack. “Without You I’m a Mess” was written and performed by none other than SPD Green Ranger Matt Austin. After you bid on the staff, go to Netflix and watch Matt’s new documentary on the late John Hughes, “Don’t You Forget About Me”.

Oh, and I need to acknowledge my dogs, Art and Print, for all the helpful advise they sprinkle throughout the videos! They really are rather clever…

I am sure you already have you copy of the Guild Season 3 on DVD. I got to do a special feature on "Making Vork's Sword". It is just one of many amazing bonus features. If you don't have it, go get one now! Click on the image below for details...


Lastly, it's the 1st of March, which means it's my good friend Simon Tams's birthday! Simon gave me my first art department job in Hollywood, and my life has never been the same. Everyone who knows Simon should give him a big hug today cause he's awesome. And everybody who doesn't know Simon can still leave birthday wishes for him in the comments! I'll print them out like a giant card! Happy birthday, my friend!

Alright, I gotta go start prepping for this next blog. Please sign up to be a member of the BarnYardFX blog by clicking on the "Follow" button to the right. Also, follow me on twitter @gregaronowitz to get updates about new topics and guests.

Thank you all so much for visiting, and good luck bidding!


Oh, and yes, Felicia, the Clove hitch is real!!!!!

Monday, February 22, 2010

How to Build Codex's Staff Pt. 2


Thanks for coming back! It’s definitely worth seeing Felicia wrestle with that Dremel! Part 2 goes through a great deal of the steps, bringing the Codex staff close to completion. As you will see, Felicia and I were still having a fun time, even though we had been working for about 6 hours at that point.

I hope you are enjoying the videos. Speaking of videos, have you gotten your copy of The Guild Season 3 yet? It has the full season, plus lots of amazing special features, including “Making Vork’s Sword”. You are only a few videos away from having your own Guild arsenal!


The Codex Staff part 2 involves the construction of a few key elements, such as the rings, the base, and the Orb. Building the “Orb” is probably the most complicated part of the staff.

Here are a few pointers I couldn’t fit into the video blog without it becoming a made for television mini series event!

*Make sure the two hemispheres that make up the inner orb (as seen in part 1) are thoroughly glued together. Any spaces or pinholes in the seam will allow the clear resin to seep into it, which will defeat the purpose of having it there in the first place. Plus, it will cause you to use a lot more resin, which is expensive!

*Don’t cheat and paint the outside of the inner orb. Remember when Felicia sprayed the lower half and painted her face green? Yeah, well, don’t do that either! But the reason we painted the inside of each hemisphere, then glued the halves together, is because the polyester resin that gets poured into the outer orb will eat through the paint if it contacts it. If you paint the outside surface of the inner orb, the resin will lift, streak, or dissolve the color away completely, and your finished orb will look hollow.

*We didn’t need this for the Avatar music video, but it might be fun to wire a light inside the inner orb with a switch on the winged ring. Just sayin’!

*Keep the pour hole that you notch out of the side of the outer hemisphere as small as possible. You will need about a ¼ inch to get the resin in and still allow air out as u pour, but any larger and you will see it in the final staff.

*Don’t over catalyze the resin! It will shrink and crack, which sometimes will yield cool effects (like in the case of the original prop for the Avatar video) but often will just look messy. It’s always good to do a few tests with new materials to understand how they work before applying them to a project you have already invested a lot of work into.

*Make sure that the outer orb is securely fastened to the staff before you pour the resin. If it breaks loose mid-process, it could end up getting really messy!

*Don’t spin the resin filled orb too much, or the light and dark resin will over blend, and you will lose any cool swirling effect that might happen. Make sure you re-fasten the staff to a sturdy object, like a chair or stool, so it won’t fall over and leak while the resin is curing, which could take hours!

*Oh, and after you spin it and secure it back down, remove the clay from the pour hole and fill the air bubble up with more resin! You may need to do this a few times as its curing, since air will find its way out and drop the level of resin away from the hole.

*The tape trick is usually pretty reliable when it comes to cutting tubes. Of course, you need to make sure the end you are starting with is already square! Try to always start with a factory edge. I had a few questions about why I do all my work with hand tools, and honestly, I cut the original prop’s PVC with a chop saw to make it fast and perfect. But I thought it would be good to show techniques that utilize more accessible tools so people just starting out can jump right in. But if you have a garage full of hardware, by all means use the best tool for the job! The easier it is to get through the steps, the more time you can spend finessing the final product!

*Also with the tape technique, don’t try to cut through the pipe straight through from one side. Take a few strokes, rotate the pipe, line your saw along the tape, and repeat until you wrap around to your original cut. This will prevent the blade from straying at an angle, and the shallow groove you cut will actually act as a guide for the blade as it cuts deeper into the pipe.

*I.D. vs. O.D.: I’ve called out the diameter of the many various tubes we used to make the different staff parts, but just know that I am usually referring to the I.D., or inner diameter dimension. When you buy a piece of PVC pipe, the size printed on the side refers to the diameter of the INSIDE of the pipe! So in truth, the actual width of a 2” pipe will be around 2-3/8”. Different states and counties have different building codes, too, so some areas may have thinner or thicker walled PVC. You can also get stock acrylic or styrene tubes from hobby or sign shops, so just keep all that in mind when you are plotting out your materials for this segment.

*Putting the Magic Sculpt in the oven is one of the best tricks ever! It really does make it cure solid in 10 minutes or less! But don’t over heat the oven, or the epoxy will bubble and burn. And, I know the dogs already mentioned this, but DO NOT leave the parts in too long, or the plastic will warp and melt.

*Lastly, for the most fun you can possible have building props, invite Felicia Day over to use power tools! It seriously never gets old!

Okay, so in addition to all the pieces you built last week, here are the materials you will need to do the steps in this installment:

Magic Sculpt Epoxy Putty

Clear casting resin

Resin catalyst

Polyester resin dyes (green and red)

Paper cups

Stir sticks

Two 1-1/2” clear plastic hemispheres

2” PVC pipe

1-1/2” PVC pipe

Cyanoacrylate glue and kicker

Sand paper grits 80, 100, 120, 320, 400

8”x8” piece of 1/8” Sintra plastic

1-1/8” inner diameter plastic tube

Hot glue

Modeling clay

Paper tape, 1”, 1-1/2”, and 2”.

Evergreen styrene stock, various sizes

Primer spray paint

And these are the tools required:

Dremel (Don’t panic, Felicia!)

Dremel bits, preferably sanding drums

Hot glue gun

Fine tooth hobby saw

Xacto with #11 blades

Circle template

Band saw

Rough files (flat and half-round)

Hammer

Small right angle ruler

Sharpie marker


Okay, so I think that covers everything. I really appreciate all the comments, and I look forward to reading more! I’m excited that so many of you have started or are planning on starting your own Codex staff! Send me pictures at gregaronowitz@gmail.com when you are done, and I will post them on this blog. Oh, and I did get a few mentions that the video wasn’t working. We’ve investigated this several times, and can’t seem to find anything wrong. I would just recommend refreshing the browser a few times. But let me know if it keeps happening!

Special thanks again to Felicia, who makes this video worth watching! And to the crew, editor Brad Allen Wilde, cameramen Pax S. Franchot, Brad Allen Wilde, Mike Houghton, Seamus Donahoe, art department Bryan Fulk, Brock Potter, and still photographer Marissa Cuevas.

Some great music in this segment!

The score is excerpts from my movie LABOU, composed by Nathan Wang.

“So Much to Gain” by Guy Harrington, from the LABOU soundtrack.

“Take me Under” by Fallbrooke. You may recall that video…

And of course, “Do You Want to Date My Avatar?” by Felicia Day and Jed Whedon.

Thanks for coming back, and make sure you check out the final installment next week. We will also post the info on how you can have the chance to own Codex’s staff made by Felicia Day herself!

Sunday, February 14, 2010

How to Build Codex's Staff Pt.1

Happy Valentine’s Day!!!! I know, I know, so many people hate this holiday because it’s a completely fictitious, commercialized holiday created by the greedy corporations to force everyone into spending money on shallow tokens of love. But, I’m the first to admit that I’m a sucker for commercial holidays! And Valentine’s is one of my favorites! I think any opportunity to express feelings for the ones you love is well worth taking. A dozen roses are fine, but if you want to take the less commercial route, it will probably make a bigger statement! I personally enjoy much more personal sentiments. I’m no expert, but I think things like participating in your loved one’s favorite activity, or making their favorite dessert (even if you despise it!) will always get a bigger smile than a teddy bear or chocolate heart. The more uniquely personal the gift, the better the surprise.

What’s not surprising is how much love fans have for The Guild! That’s why Felicia Day and I cooked up this heart shaped box of laughs for you! I hope it makes your day brighter than any corporate greeting card could!

I know I had a great time filming this. Felicia worked over 12 hours in the shop with me, and we spent most of that time laughing! I swear to you that there was not a single dull moment of footage, but Brad somehow managed to cut it down to three 7-minute segments. I will post the others each a week apart. Believe me, you won’t want to miss the end result! Speaking of which, check out the Part 3 post for details on how you can own the Codex Staff that Felicia made!

I hope you enjoy my first video blog! I have to give very special thanks again to Felicia, for taking the time to do this with me. I always relish any chance I can get to work with her. Felicia is the real deal: rocket scientist smart, movie star beautiful, renaissance talented, laugh out loud funny, and, honestly, the hardest working person I have ever met. Felicia is the sole frontrunner of her career, which spans television, film, web series, comic books, video games, acting, writing, producing, 24 hour a day social networking, and somehow she still finds time to play Xbox till all hours of the night. She makes me feel like a slacker!(And you guys know how many hours I put in!) I consider myself very lucky to have gotten so much of her time for this blog!


Fans of the GUILD are fans of her show because, well, it’s HER show! Felicia Day is on the front line of the future of entertainment. She is really changing people’s minds about how Hollywood should be run, and it’s an honor to even be in the same room as that’s happening.

And for all those who have no idea what I’m talking about, check out The Guild: Season 3 on DVD! It is available tomorrow, February 15th. If you think this 7 minutes is funny, you may never take that DVD out of your disk drive! It’s the best.

As for the Codex staff, you will need these supplies if you are going to spend your V-Day building what we did for part one:

One 1-1/8 “ wooden dowel, 48” long

Two 6” clear plastic hemispheres

Two 4-1/2” clear plastic hemispheres

Sandpaper, grits 100, 240, 320, 400, 600

Plastic polish, scratch remover

Soft rags or shammies

Green pearlescent spray paint

Cyanoacrylate glue and kicker

One 1-3/4” drywall screw

12”x12” piece of 1/8” Sintra plastic

Magic Sculpt Epoxy putty

Drawing Paper

3M Spray 77 adhesive

Paper tape

And these tools:

Xacto knife with #11 blades

Pencil

Scissors

Ruler

French Curves

Ruled circle template

Dental wax spatula

Files

Cordless Drill

Drill bits

Screw tip

There will be more supplies needed next week, but I guess we’ll take this one step at a time. Alright, no sense doing all this typing when there’s video to watch! As always, feel free to ask me any questions about the process in the comment section. Enjoy, and I hope to see you back next week! Oh, and save me some of those chocolate covered strawberries…c’mon, you can hate the holiday, but you know you love those strawberries!

Credits:

Guest Director: Sean Becker

The legendary director of THE GUILD dropped by to say hi, and was kind enough to stick around for the first few hours to help me put all the pieces of the puzzle together. My head was spinning, and Sean’s presence and suggestions got things off to a great start. Thanks!

Camera Crew: Pax S. Franchot, Brad Allen Wilde, Mike Houghton, Seamus Donahoe

These guys lit the set and helmed what ended up being a 4-camera shoot!

Editor: Brad Allen Wilde

Brad couldn’t stay for the whole shoot cause he had a film playing in a festival, so he was shocked to come back and find over 20 tapes worth of footage! Mike digitized it all, then Brad tirelessly spent the next week whittling it down to what you are watching. If I can convince him to give me another day, there might even be an out takes reel posted!

Art Department: Bryan Fulk, Brock Potter

Originally, I was going to film this blog like a cooking show, where Felicia would start a part, then these two guys would finish it off camera as I introduced the next part. I thought it would save time. But Felicia was so into it, she actually followed through on all the work herself! So these guys help shave some time off by making sure we had everything we needed standing by, and they both even jumped in to man a camera from time to time!

Still Photography: Marissa Cuevas

When she isn’t busy being a movie star, Marissa loves taking pictures. She stood by all day and grabbed some great moments, along with a complete step by step of the process, which I will post at a later date.

Music:

“Do You Want To Date My Avatar? “

By Felicia Day and Jed Whedon

“Losin’ It”

By Fallbrooke http://fallbrooke.com