Have you seen this show yet? It's pretty amazing. The concept is that a kid tells a story, straight from their imagination, live on camera, and then filmmakers use that as a script and bring the story to life. There is currently a full season of 10 episodes up on Geek & Sundry, and they are definitely worth a watch!
I was first introduced to the show by Executive Producer Kim Evey, who asked if I would direct an episode. It sounded right up my alley, so I jumped on board immediately. The show was still in it's early stages, so filming was a few months off, but Kim asked if I would design the logo as they were gearing up for production.
I created multiple pages of sketches, some very sophisticated logo concepts, others strong title designs, but the thing that everyone responded to instantly was a doodle of a kid riding inside a pencil, drawn as if by a child's hand. It pretty much looked exactly like what you see above, with the exception that the final was refined in Adobe Illustrator to make it look a little slicker. Amish put together the opening title sequence in After Effects, and so began the BarnYard's journey into Written By A Kid!

Photo 1: The show works by pairing kids with directors that click with their stories. Kim and the gang chose the directors they wanted to work with, and everyone got to watch the interviews and pitch their take on the kid's story they were most drawn to. I chose three different stories, and pretty much found an angle on each one to bring puppets into the mix. Everyone was pretty excited about the concept of using puppetry, and while I was waiting to find out which story I would get, Kim called me and said, "If that's how you are going to do it, I really want you to do a story you haven't heard about yet! It's called Ginger Potato, and I think it's perfect for you."
So I designed and directed Ginger Potato. It's the story of a gingerbread man named Gumdrop who just can't catch a break. As with all the projects I direct, I start with dissecting the characters. Or, in this case, building them!
I began the gingerbread puppet process by cutting out the silhouette of Gumdrop from a sheet of sintra plastic.

Photo 2: Then I built up a thickness of roma plastilina #3 clay to give him shape and dimension. I only made this sculpt half as thick as I wanted the final puppet. I finalized the sculpt with a light texture to simulate cookie dough!

Photo 3: When the sculpture was complete, I hot glued it to a piece of foam core, and made foam core walls around it. I then poured silicone over it to make a negative box mold. This was to become the back side of Gumdrop.

Photo 4: I was able to pull the mold off without damaging the sculpt, so I reused it create Gumdrop's front half. I sculpted "frosting" in the shape of clothing, and made indents for his eyes. I thought about leaving his body blank and adding the frosting later with silicone or slip latex, but I knew I would need multiple puppets, which would mean making exact duplicates of the hand applied clothing, plus the worry of it peeling, popping, and cracking.
I didn't take any pictures of the front half for some reason, but you can see the sculpted frosting in the negative mold above.

Photo 5: Mark Viniello ran the foam latex for me, and he tinted it to such a perfect gingerbread color, I didn't even bother painting a base coat! Here you see two assembled puppets, consisting of a front and back foam glued together, and the side seam coated in prosaide. The upper puppet is getting his gumdrop "shoes", which I made from chunks of mattress foam, scissor cut to shape, stippled with PAX paint, and coated with clear glitter.

Photo 6: I ended up making a total of three puppets for this shoot. The one on the left is the "bottom puppet", named so because of the permanent rod protruding from his bottom. The rod goes all the way through the body and attaches to a styrene disc inside Gumdrop's head. When I turn the rod, the puppets head turns. This puppet was mostly used for close-ups where you couldn't see him from the waist down.
The middle puppet was used for shooting the sequence when Gumdrop first wakes up, and before he is dressed. I made this version using two back halves. When you see him before he puts his eyes on, you are looking at the back of this same puppet. After he has eyes, I just flipped him around.
The last puppet is the most used of all. He is a fully rod puppet, meaning that I operated him completely with external rods. He has no armature whatsoever, the foam he is made of was just the right density to allow him to move in all the right places.

Photo 6: I embedded small sleeves of brass square tube stock into each hand, the bottom of each foot, and the top of his head. I could move each limb by manipulating long rods of solid brass square stock that fit perfectly into these sleeves.

Photo 7: I am the first one to argue the advantages of practical effects in this digital age, but I firmly believe that the best results are achieved when you use all the best tools at your disposal. So I decided that I would keep my puppets simple, but give Gumdrop lifelike expressions by adding a CG mouth in post. In order to do that, we had to add red tracking dots onto his face so that Mazin Dazani would always know where the mouth needed to be as the head turned and moved around in the frame. Here's his explanation of how all that compacted stuff works:

Photo 8: Now that Gumdrop is a fully realized character, I needed to give him a home. Ima, who crated the story, was very descriptive about where Gumdrop lived. She mentioned that his house was pretty normal looking, but smaller. And of course, made of candy and gingerbread! This house is actually made of sintra, stippled with bondo, and painted with acrylics. But it still looks tasty!

Photo 9: The next step was to tile the roof. I went with vanilla wafers. And a lot of them, too! If you live in the Los Angeles area and noticed a shortage of cookies at your local grocery store, now you know why! We bought out several stores multiple times over! It may not look like tons of cookies, but each side of the roof took about 8 boxes, and we made two houses!

Photo 10: The first house was the "hero" house, that always needed to look pristine and perfect. I wanted it to last a while, so I decided to do all the frosting using white silicone tiling caulk. It worked really well, but the second "stunt" version of the house needed to be edible, as the actor playing Potato would be bitting chucks off of it. So I made a simple frosting from powdered sugar. Again, simple enough, with the exception that we used about 10 pounds of powdered sugar before we were done!

Photo 11: I really wanted the hero house to be a permanent part of the BarnYard collection, so my original idea was to mold, cast, and fabricate ALL of the candy decorations. I figured if it was all artificial, it would last forever. unfortunately, there wasn't the time or budget, so we went with real sweets.

Photo 12: And again, A LOT of them!!! This 3.75 pound bag of Jolly Ranchers is one of 5 we used to make the candy brick work for this episode. I don't think I've eaten that many in my life.

Photo 13: Here is edible version of the chimney being made. It was laid up like real brick and mortar. just stickier. A second hero version was made using silicon caulk between the Jolly Ranchers.

Photo 14: Oreos, Lifesavers, ribbon candy, candy canes, sour patch ribbons as curtains, you name it, we used it. And ate it. I can honestly say that working with this much candy was one of the hardest things in my career. The difficulty of building with it was only matched by the stomach aches from eating every other piece!

Photo 15: Gumdrop wasn't the only one who needed a home. I decided right away that I would build Potato's house, too, instead of finding a location. I would have more control over the design and the lighting, and Chris Darnell and I could create a more stylized look because of that. Web budgets being tight, I had to carefully chose how much of the house I wanted to see, and create the environment around it accordingly.

Photo 16: We shot on a sound stage, and I thought having a tall, solid fence would make it easier to sell that we were outdoors, especially since most of the shots would be from a low puppet level. I went with bright, cheerful colors, because that's what i saw in my mind as Ima told her story.

Photo 17: We essentially had a "3 walled set" for the shoot, consisting of the side of the house, and a corner of fence.

Photo 18: For those few shots were we did look up, James O'Connor painted the walls behind the set blue to represent sky. The work light up in the corner makes it look like we already had a sun!

Photo 19: The whole story revolves around an apple tree in the back yard, so I went to Jackson Shrubs in North Hollywood to see if they had anything that worked. There was something about this particular tree that appealed to me, but it was lacking a low hanging branch where I could puppeteer Gumdrop. The greensman were happy to add one on for me, so i lucked out with the perfect tree. I only needed to add the apples!

Photo 20: Once everything was built and ready to shoot, I did a quick pass of storyboards to show everyone HOW we were going to shoot it. Ordinarily, I like to have very polished boards with clean drawings, but with so much to do in so little time, I felt that my chicken scratch first pass doodles were sufficient enough to get us through the shoot. The most important thing is that they show composition and movement through the frame, so that all the visual departments can be on the same page.
Above is an example of a sequence, comparing the original board to the final frame below it. You can see how close they match, with the few exceptions of adjustments made during filming to work better with the set.

Photo 21: Finally, we were filming! I had a small crew, but everything was very localized, so setting up the lighting and camera equipment went very quickly. Chris decided to shoot on the RED, which helped a lot in the post, giving us the highest resolution to work with on the FX plates.

Photo 25: If you have watched Ginger Potato already, you certainly recognized the amazing Bonnie Friedericy as Potato's mom. I'm a huge fan, and I love her as the General on Chuck. It meant a lot to me that she came out to do the role, and it was really fun working with her. Hopefully we'll do it again some time soon!

Photo 26: If you are unfamiliar with how movie sets work, here's a basic break down: The director watches the actors on a monitor.

Photo 27: The DP, or Director of Photography, watches the lighting and the movement in the frame through the camera.

Photo 28: And the producer watches everything and everybody! Kim Evey stayed on set with me the whole time, making sure everybody had what they needed, supervising all of the paperwork, business and legal stuff, and provided a second pair of eyes to help keep me on track with actor performances, schedule, and storyboard matching. Kim is one of my best friends, and we work on lots of stuff together, and I can honestly say I rarely see her away from that computer!!! Even a potential shark attack cannot break her cyber concentration!

Photo 29: Caption this photo as you will...

Photo 30: I was originally thinking about a kid for Potato, but the second Kim introduced me to Michael Busch, I knew he had to play the part. He has very youthful features, and his talent enabled him to capture the spirit of the tyrannical neighbor kid we all had to grow up next to. His acting convinced you he was a child, but he is so clearly an adult, it really just help solidify the surreal quality I was looking for in the show.
I love this photo of Michael relaxing as we set up for the interior night shot because it shows how little set we actually had! The bedroom "interior" was literally the back of the exterior wall painted blue, and it was hardly longer than the bed.
You can also see Lindse, one of my model makers, standing in front of the New York hallway set. Keeping in mind that the backyard and fence is right outside of Michael's window, you can get a sense of how small our shooting area was!

Photo 31: Speaking of the New York hallway set, one of my favorite parts of Ginger Potato was the gingerbread Brownstone. Ima mentions in her story that Gumdrop "buys a house" when he gets to New York. I may have jumped to my own assumption, but it seemed to me that by New York, she meant NYC. I thought it would be fun, and less repetitious, if instead of Gumdrop's new home being in the yard again, or even on the street, it was a miniature Brownstone in the hall of a full size duplex.
Red 5 took my drawing and the instructions that "everything had to be brown" and crafted this awesome (and truthfully the most delicious smelling model I have ever come across) facade from graham crackers, cinnamon sticks, caramel cubes, Hershey's frosting, Milky Way stairs, and a Nestle Crunch door.

Photo 32: It's kind of an inside joke, probably only funny to me, that I based the design for the Brownstone on a similar one in Manhattan that housed Jim Henson's company. For years, the muppets were made there, so it seemed only fitting that a puppet would want that style for himself.
I went with a darker, dingier wallpaper for the hall, since most of my memories growing up on the East Coast reflect that. Not in a creepy way, just more in an older building due for some maintenance sort of way. It just felt more natural to me than a Uptown, modern building type condo.

Photo 33: Every once in a while, when dropping off a foam run, Mark will bring his kids to the BarnYard. They love to play with Art and Print, and his daughters, not surprisingly, are very well versed in the art of special effects even at their young age. His entire family is very photogenic and jovial, and he mentioned once that Ava often talked about being an actress. I wasn't sure if she would want to do it at first, but it was only a few hours after I asked Mark if Ava would be interested in playing Potato 2 when I received this drawing of us on set with Gumdrop.
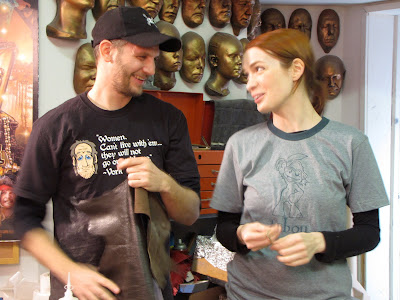
Mark brought Ava and her sisters to the set, and they seriously were like a flock of angels. They helped decorate the set, and even took turns calling "Action!" Ava took direction like a seasoned pro, and she is so adorable in the end sequence I wish we could do a sequel. I told Felicia that there needs to be a Guild flashback were Ava plays the young Codex. To see what I'm talking about, watch this behind the scenes clip:

Photo 34: We wrapped photography on the stage, but only half of the storyboards were x'd out. A big chunk of the show takes place inside Gumdrop's house, and that was going to be a second day of shooting on a miniature set at the BarnYard. But first, I had to build the set! I hate repeating myself, so i wanted the interior design to include all new and diverse candy from the exterior. Influenced by the original Willy Wonka, I decided to go with the idea of edible wallpaper. It took several trips around town to buy up all the available candy buttons. The people at Rocket Fizz in Burbank thought I was crazy!

Photo 35: The interior house was a three walled set, the basic structure made from sintra. I spray painted the walls a light blue base, then spray mounted the candy button strips to look like 50's style stripped wall paper. The "home sweet home" sign (America Young smiles knowingly) is actually made of stacked layers of sintra painted brown, although I did write the words in cake decorating gel!

Photo 36: Another huge bag of Jolly Ranchers was cracked open for the fireplace. I kind of had to repeat this idea for bricks, so it tied into the chimney. But I can't complain, it worked really well! One thing I can complain about: Those damn Jolly Rancher wrappers!!! Why are they so hard to get off! I swear it took longer to unwrap all the candy than it did to assemble the final prop.

Photo 37: In a effort to save time, Red5 came up with the plan to hot glue all the Jolly Ranchers in place, perfectly spaced, and then pipe in the icing around them, rather than build it up layer by layer like the chimney.

Photo 38: Sadly, any time saved there was lost unwrapping the HUNDREDS of Starburst Fruit Chews we needed to tile the floor. Who's brilliant idea was that? Regrettably, mine. Well, regrettably at the time as it took days to assemble, especially since the floor had to have hidden trap doors in it for puppeteering, but now that I watch the final film, I wouldn't change a single tile. I would, however, eat less Starburst! I bet this is my dentist's favorite thing I ever filmed...

Photo 39: Each Starburst was glued in and had to be gently shaped by hand, as they are all not perfect squares. The toughest part was making sure that no two tiles of the same color ever came into contact with each other. We mixed the traditional flavors with bags of the tropical flavors for more variety, but it was enough floor space that it got tricky to avoid color collisions!

Photo 40: I created Wayne's coating out of Kit Kats. A word of advice: Don't use Kit Kats for model building. They taste great, but the melt so easily, and they're impossible to glue! I had my fingers crossed during the entire shoot, hoping they weren't going to just crumble onto the Starburst floor!

Photo 41: Gumdrop is quite the interior decorator! Lollipop throw rugs, fruit roll-up carpet, candy cane chairs, pop-tart table, marshmallow nightstand, rock candy chandelier. He has all the sweet furniture. The bed is the only thing in his home NOT made of candy. I toyed around with the idea of different kinds of candy beds, but I knew I wanted him to be "baking", so in the end, the idea of heater coils and candy didn't really mesh. It made more sense that he would have an "easy bake oven" type of set up, and since this was more of equipment than furniture, I was ok with sugar not being the main construction material.
Another early idea was to use miniature neon to create the "hot coil" effect. It proved to be too costly, so it bumped to an After Effects plate. But on the day, Chris lit it so well, it ended up being a simple practical lighting gag in the final film. Maz was very happy.

Photo 42: Another view of Gumdrop's home, as he sleeps under the oven coils. None of that was part of Ima's story, but it just seemed like the right way to introduce the character. I figured she was telling a "day in the life of a gingerbread man" story, so I wanted to show how a typical day starts for him. The piece is very short, and since he's our hero, the concept of watching him wake up and prep for a good day in the yard endeared him to me, and hopefully you, which makes Potato all that more menacing.
I think its funny that I didn't even bother finishing the top of the oven canopy. This photo shows an angle I never intended to shoot for the film, so I just didn't put any detail into anything outside the lens. Obviously, the danger in doing so is it limits your ability to make radical changes to the camera placement, but since the director and the designer are the same person, there wasn't a lot of finger pointing!

Photo 43: I hope you enjoyed the tour of Gumdrop Potato! I just realized that there wasn't much explanation about the puppeteering aspect of the show, but I guess we can save that for another blog! I have a few more awesome puppet projects coming up soon, so be sure to come back for more information. Oh, and don't forget to wish Kenny Mittleider a happy birthday in the comments below! This blog wouldn't exist without him!!!